How to create a pop-up in Squarespace

Got a goal in mind and looking to catch the attention of your website visitor? A pop-up can be a really great marketing tool to do just that. And using the built in Squarespace Promotional Pop-up tool, it’s an easy thing to add to your site.
There are many ways you can use a popup:
Use it to get people to sign up to your newsletter or download your freebie
Promote a sale or a discount
Make an announcement
Promote a new product or service
Promote an event
And more…
We even used pop ups during the pandemic to promote the safety practices of some businesses. It was important info that needed to be front and center.
How to add your pop-up in Squarespace
Here are the steps to take to add & customize your pop-up. You will need to be on Business Plan or higher to have access to the pop-up panel.
Step 1: Navigate to the Promotional Pop-Up Panel
From the Home Menu click Marketing
Click Promotional Pop-Up
You’ll now see a panel on your left with your pop-up options and the default pop-op in the main screen on the right. As you make changes to your pop-up options you’ll see the changes to the pop-up in the main screen.
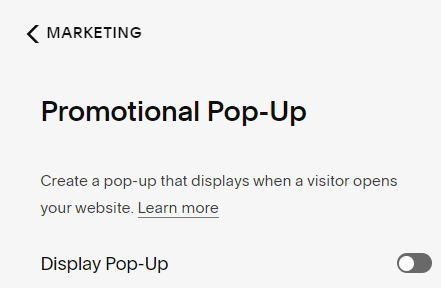
*For now leave the “Display Pop-Up” toggle off. You’ll set the display toggle on when all the edits are complete.
Step 2: Choose a Layout

There are 7 pop-up options (including the default) that cover part of the screen. One of those layouts shows at the bottom of the screen only, which leaves most of your content unobstructed.
There are also 2 full screen layouts available, but I would recommend against using these. Google doesn’t like them (bad for SEO) and neither do most of your users.
In the panel, click CHANGE LAYOUT or the image above it to view your layout options
Hover over the images and click SELECT to view/choose an image
Click SAVE
Step 3: Choose your Action
Next, Click on ACTION in the Promotional Pop-up Panel. Here you can choose between two options for your visitors. They can sign up for a newsletter or click a button.
Option 1: Sign up for a newsletter
Use the newsletter option to get your visitors to sign up to your list. This option allows for Squarespace Email Campaigns, Mailchimp or Google Drive only as its storage options. For other email marketing services like Convertkit or Flodesk you’ll need to use option 2.
Select Sign up for a newsletter in the GOAL section
You will see 4 tabs: Button, Storage, Verification and Post-Submit
Click the Button tab to change the button text or disclaimer text
Click Storage to connect to your email campaign service
Click Verification to turn on reCAPTCHA (optional). By default, Squarespace Email Campaigns will send a verification email
Click Post-Submit to add a message that will appear after your visitors subscribe to your list
Click SAVE after you’ve made all your changes
Option 2: Click a button
The click a button option lets you to add up to 2 buttons on your pop-up. These buttons can lead to a page on your site, a file or anywhere on the web. So it gives you a ton of options. You can use it to link to an event page, a new product, to your newsletter sign up form and more.
Select Click a Button in the GOAL section
Add your button text in the first field (Link Label)
Click the cog icon to open up the links pop-up and set your link
Click Save to close the pop-up
Add a second button (steps 1-3) or click SAVE
Step 4: Add your Content
Click on CONTENT to add the headline and body to you Promotional Pop-up.
Try to keep the text in your pop-up fairly short. The headline font size will get smaller as you add text until the headline eventually cuts off entirely. More text in the body will make your pop-up expand over your page, which won’t look great.
Plus, shorter text will make your pop-up catchier and easier to read!
Step 5: Set the Display and Timing of your Pop-Up
Next we get into the when & where of your pop-up. I think this is one of the most important sections, especially for your visitor’s experience on your website.
Click DISPLAY & TIMING to go to the panel options.
PAGES
Your pop-up can appear on any page of your website (the first page only) or you can select the page or pages that it can appear. So, if I get to your website though a blog post, but you’ve set the pop-up to appear only on the home page, I won’t see it until I go to the home page.
To show the pop-up on any page, keep the default “Any first page” in the drop down
To pick your page, choose “Only certain pages”, then click on your pages in the second dropdown to select them
TIMING
This section lets you decide when your pop-up shows up. You can have it show up immediately, when someone scrolls down a percentage of the page, after a bit of time or by a combo of scroll and time.
I think it’s better for your visitor’s experience on your website if you don’t have the pop-up display immediately. As a visitor, I want to know I’m on the right site and see what’s there before a pop-up comes up.
FREQUENCY
How often do you want your visitors to see your pop-up?
The next day?
1 week?
2 weeks?
30 days?
Never again?
These are your choices in the frequency section.
DON’T SHOW AGAIN AFTER NEWSLETTER SIGN UP
If your Promotional Pop-up uses the “sign up for a newsletter” action, then I would recommend keeping this checked.
SHOW ON MOBILE
Check this to show your pop-up on mobile devices. Make sure your design covers no more than 30% of the screen for SEO purposes and is easy to close.
Google will penalize websites that have “intrusive” pop-ups on mobile. So, if you have the same info elsewhere on your website and you don’t want to risk Google’s wrath, you may want to leave this unchecked.
RESET
Have you made changes to your pop-up that you want all your visitors to see? Click the reset button so that they see your new pop-up on their next visit no matter when they saw it last.
Step 6: Add an Image

Click IMAGE to add one or more images to your pop-up. Adding more than one image will turn your pop-up into a slideshow. Click the + icon to either upload images or use images from your library or Unsplash.
*Make sure the image file name and size are optimized for SEO.
If you want to add a solid colour instead of an image, skip this step. You can add a colour in the Style Panel (IMAGERY > Custom Overlay color)
Step 7: Style your Pop-Up
Back in the Promotional Pop-Up panel click STYLE to add your brand and website styles to the pop-up.
In the styles panel you have the option to change:
The colour and fonts of your headline, body, button and newsletter text
The background colour of you popup
The overlay colour of your image
The shape and style of your buttons
The overlay colour for your images
Mobile specific styles
You can also change some spacing and padding of the pop-up if you set Overlay Design > Advanced Layout to Enabled.
Final Step: Display!
You’re now ready to go live. Go back to the Pop-up Panel and set the Display Pop-Up toggle to on. Congrats! You now have a Promotional Pop-Up on your Squarespace website.
Want a website that’s easy to use and maintain? Let’s chat!